
A slippery deck can be treacherous, learning how to stop decking being slippery can give you the confidence to walk over your deck without the fear of falling and badly hurting yourself.
Decking only becomes slippery due to lack of maintenance. Wood as a natural product is not a slippery surface, a wooden deck only becomes slippery when mold, algae and moss are given the chance to form. With regular yearly cleaning, the mold, moss and algae will be kept at bay.
Why does decking get slippery?
I’m going to bust this myth right out of the water!
Wooden decks (and this goes for composite decks too) are ONLY, I repeat, ONLY slippery when mold, algae and moss are present.
Add some rain water to the mix and its Torvill and dean time! (Famous ice skaters)
The contributing factors to the mold and algae etc are down to lack of maintenance and the location of the decking.
The reason I mention location, if your deck isn’t get much sunshine it won’t fully dry out at certain times of the year, so the risk of the mold and algae etc growing will be much greater.
That is why keeping on top of the maintenance is so important to stop decking being slippery.
Anytime you see dead leaves on the deck remove them, and make sure you keep unwanted debris off the deck with a sweep once a week.
But most importantly it’s the yearly maintenance you MUST do in order to keep your deck slip free and looking its best for years to come!
This will involve a deep clean to remove any build up of moss and algae etc and a re-stain or oiling of the deck if needed.
What Is The Best Thing To Clean Decking With?
Ronseal decking cleaning and reviver is my go to cleaner for decking, without a shadow of a doubt!
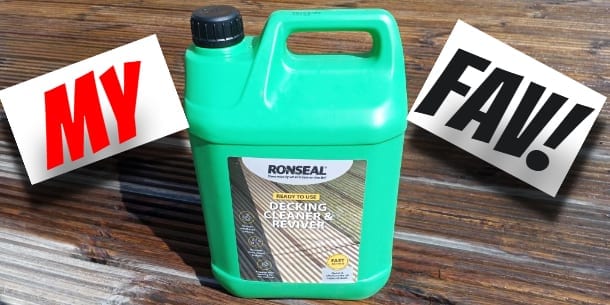
I have been using Ronseal decking cleaning and reviver from the beginning of my handyman career. It has always shifted the most stubborn of mold, moss and and algae that I have ever come across.
Within an hour your deck will be clean and ready to re-oil or re-stain.
But I have noticed through my handyman career that some customers will turn their noses up when they see that I am using this Ronseal product, because they’ve used it previously and had poor results.
When I question how the poor results came about, it was mostly down to not using the right equipment.
The Ronseal decking cleaner and reviver specify on the back of the product that a hard bristled broom and a pressure washer will give you the best results.
Most customers who had poor results either used a SOFT bristled broom or didn’t have a pressure washer.
And I do understand that some of you who are reading this post won’t have a pressure washer, and Ronseal do say you can just hose it down.
But believe me with my experience with this product, you NEED to use a pressure washer for the best results.
Amazon stock a huge range of pressure washers to suit all budgets, get one, honestly you wont be disappointed.
How To Clean Slippery Decking – My Way.
Cleaning a deck using the Ronseal cleaner, I have over time found this method below to give you the best results to stop decking being slippery.
My directions only slightly differ to those on the back of the Ronseal cleaner and reviver bottle, but by far give you a better result than the original directions.
Step One – Sweep and pre-wet
Give your decking a good sweep and then pre-wet it.
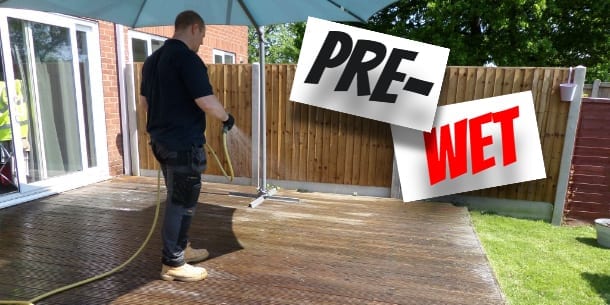
You don’t need to soak it through just make sure its wet, this will help stop the Ronseal decking cleaner and reviver being absorbed too quickly in to the decking boards.
We want it to hang about on the top of the surface long enough to break down the mold, algae and moss.
Step Two – Apply the cleaner.
Now it’s time to start applying the Ronseal deck cleaner and reviver.
You don’t have to be to neat with the cleaner, you can pour or sprinkle or even use a watering can if you like.

Using a hard bristled broom begin brushing the cleaner into the boards. You should be able to do three boards at a time with a standard size broom
I’m not gonna lie, there is some elbow grease involved, but a little hard work never hurt anybody 😉

Once all the boards have been scrubbed with the deck cleaner, grab a brew and leave to soak.
The instructions say 15-20 mins but I find this isn’t enough time for the product to really get in and start breaking down the grime.
From my experience I always leave the cleaner to do its work for 30 minutes, this always gives me the best results.
Just keep an eye on the deck from drying out, if it starts to dry, just lightly mist the deck with a hose.
Step Three – Rinse off
After 30 minutes have passed, its time to pressure wash the ronseal deck cleaner and reviver of the deck.
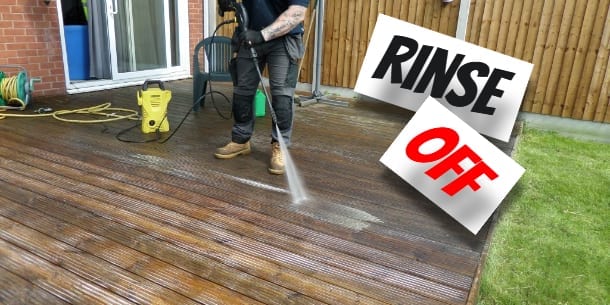
Keeping the pressure washer lance at knee height, spray from the beginning of each board using a forward and back motion until all the cleaner and debris have been removed.
Once all the boards are clean, leave to dry.
Step Four – Re-oil or re-stain
If you need to re-oil or stain the decking, I would give yourself two days to do this job, one day to clean, second day to re-stain/oil.
You may have to space the days apart if the deck is still damp the following day.
Just make sure the deck surface is completely dry or the oil or stain will not adhere or go deep enough into the wood fibres.
This is because the water will still be in the pores of the wood and will try to displace the stain/oil from penetrating the wood.
Is It OK To Jet Wash Decking?
Absolutely!
And like i said, a pressure washer will give you the best results!
But there are a few things you need to be aware of before you do it.
Jet washing (or pressure washing) has the ability to really damage the surface of the decking boards, to the point sanding may have to be done if your too harsh with the lance.

Holding the lance too close to the board will actually remove the top layer of wood that would be holding your previous stain/oil, and will actually cause the wood to fur up.
Once the board dries the furs will become little splinters.
You will then have to sand the entire deck to remove the furs, clear away the dust and reapply a stain or oil, turning it into a bigger job than it needs to be.

Instead, hold your lance knee height away from the boards as you spray, make sure you spray in even strokes, preferably following the grain of each board to minimise marking from the powerful jet stream of water.
If there are some really stubborn stains, then you may go closer with the lance but be prepared for some damage if your not careful.
How Do I Make My Deck Slip Resistant?
There are products on the market that will stop decking being slippery even when moss and algae etc are present, and even ice!
They are in the form of stains, a special type of tape and strip inserts.
Stains
Cuprinol are a extremely popular for deck stains. Cuprinol deck stains also boast an anti-slip technology.
Cuprinols anti-slip deck stains contain microscopic beads that create a gripy texture to the surface of the decking boards to eradicate the risk of slipping.
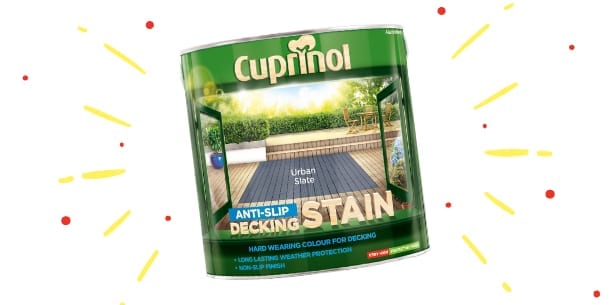
It is especially beneficial in the winter when frosty nights and mornings become more frequent.
The only downside to using a deck stain is that they have the tendency to flake prematurely, making a deck look tired.
This adds to the maintenance of your deck (which can be a chore) but if you fix any flaking when it comes apparent, its an easy thirty minute fix.
Scrape the flakes away, quick sand and reapply the stain.
Just make sure when purchasing a deck stain, you always buy a spare tin for future maintenance and colour match.
Tape
If you’ve had chance to have a go on a skateboard you would of noticed there is a black grippy surface that coats the top of the board.
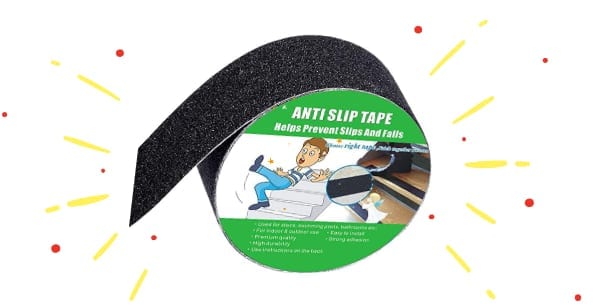
This is known as grip tape.
This tape is actually available for decking, believe or not!
Amazon stock the tape in various widths, but can also be cut down to size to fit any type of decking board.
Just peel off the backing paper and stick!
Strip Inserts (I totally recommend!)
Non slip decking strips are my favorites, they are hard wearing, rot resistance, leave a nice tidy finish and also come in many colours to choose from to suit an arrange of decking colours.

The decking Strips are usually 500mm (half a metre) wide, and are affixed to your decking by screws.
Amazon stock the non slip anti decking strips in six different colours and fixings are also included too.
Did This Post Help?
Now you know how to stop decking being slippery will no doubt give you back the confidence to walk over your deck when its wet.
let me know in the comments section below if you have never cleaned your deck!
You will be surprised how many get neglected.
Each and every week I put my heart and soul into providing you with great content to help with any DIY jobs around the home.
If you think this post could help someone you know, please share.

Other Helpful Maintenance Articles
What Direction Do You Lay Decking Boards? – Confused about what direction do you lay decking boards? Should they run left to right? Or up and down? What about diagonally? I have the answers…
How Do I Keep Wasps From Building Nests Under My Deck? – How do I keep wasps from building nests under my deck? Find out everything you need to know to defend your deck from those yellow jacket thugs!
Is It Better To Water Plants In The Morning Or At Night? – Are you wondering is it better to water plants in the morning or at night? And does tea and coffee really benefit your plants? Find out the truth here!